Progressive Web Applications (PWAs) have revolutionized the way we think about and develop web applications. Combining the best of web and mobile apps, PWAs offer the speed, reliability, and engagement of a native app with the reach and accessibility of the web. Meanwhile, Svelte, a modern JavaScript framework, provides an innovative approach to building reactive user interfaces with its compile-time optimizations and minimal overhead. In this article, we will explore how to build a robust PWA using Svelte, complete with code examples, step-by-step instructions, and best practices.
What is a PWA?
A Progressive Web App (PWA) is a type of application software delivered through the web, built using common web technologies including HTML, CSS, and JavaScript. PWAs are intended to work on any platform that uses a standards-compliant browser. Key features of PWAs include:
- Progressiveness: They work for every user, regardless of browser choice.
- Responsiveness: They fit any form factor, desktop, mobile, or tablet.
- Connectivity Independence: Enhanced with service workers to work offline or on low-quality networks.
- App-like Feel: Interact with users as if they were native applications.
- Freshness: Always up-to-date with service worker updates.
- Safety: Served via HTTPS to prevent snooping and ensure content hasn’t been tampered with.
- Discoverability: Identifiable as “applications” thanks to W3C manifests and service worker registration.
- Re-engageability: Features like push notifications to keep users engaged.
- Installability: Allow users to “keep” apps they find most useful on their home screen without the hassle of an app store.
- Linkability: Shareable via URLs, avoiding complex installation.
Why Svelte?
Svelte stands out from other front-end frameworks because it shifts much of the work to compile time, producing highly optimized vanilla JavaScript at build time. This approach results in smaller bundles and faster performance. Here are some reasons why Svelte is an excellent choice for building PWAs:
- Compile-Time Optimization: Svelte compiles your code to highly efficient JavaScript at build time.
- No Virtual DOM: Svelte updates the DOM surgically when the state of your app changes.
- Component-Based: Encourages reusable, encapsulated components.
- Reactivity: Svelte’s reactivity model is straightforward and easy to understand.
- CSS Scoped Styling: Styles are scoped to components, preventing CSS leakage.
Setting Up Your Environment
Before we start building our PWA with Svelte, we need to set up our development environment. This includes installing Node.js, npm, and Svelte.
1.Install Node.js and npm: If you haven’t already installed Node.js and npm, download and install them from nodejs.org.
2.Create a New Svelte Project: Use the Svelte template to bootstrap a new project. Open your terminal and run:
npx degit sveltejs/template svelte-pwa
cd svelte-pwa
npm install
3.Start the Development Server: Start the development server to see the default Svelte app.
npm run dev
You should see the Svelte app running at http://localhost:5000.
Building the PWA
Step 1: Create the Application Shell
The application shell is the minimal HTML, CSS, and JavaScript required to power the user interface. It should load fast and be cached for offline use.
App.svelte
We’ll start by modifying ‘App.svelte’ to create our application shell.
<script>
  let message = "Welcome to Your PWA with Svelte!";
</script>

<main>
  <h1>{message}</h1>
  <p>This is a simple Progressive Web App built with Svelte.</p>
</main>

<style>
  main {
    text-align: center;
    padding: 1em;
    margin: 0 auto;
    max-width: 240px;
  }

  h1 {
    color: #ff3e00;
  }
</style>
Step 2: Add a Web App Manifest
The web app manifest provides information about the app (name, author, icon, description, etc.) in a JSON file. This is used by the browser to enable installability and to provide a more native-like experience.
Create a ‘manifest.json’ file in the ‘public’ directory:
{
  "name": "Svelte PWA",
  "short_name": "SveltePWA",
  "start_url": "/",
  "display": "standalone",
  "background_color": "#ffffff",
  "theme_color": "#ff3e00",
  "icons": [
    {
      "src": "/icons/icon-192x192.png",
      "sizes": "192x192",
      "type": "image/png"
    },
    {
      "src": "/icons/icon-512x512.png",
      "sizes": "512x512",
      "type": "image/png"
    }
  ]
}
Step 3: Register a Service Worker
A service worker is a script that the browser runs in the background, separate from the web page, enabling features that don’t need a web page or user interaction. Service workers are a key part of the PWA functionality.
1.Create Service Worker: Create a’ service-worker.js’ file in the ‘public’ directory.
const CACHE_NAME = 'svelte-pwa-cache-v1';
const urlsToCache = [
  '/',
  '/global.css',
  '/build/bundle.css',
  '/build/bundle.js'
];

self.addEventListener('install', event => {
  event.waitUntil(
    caches.open(CACHE_NAME)
      .then(cache => {
        return cache.addAll(urlsToCache);
      })
  );
});

self.addEventListener('fetch', event => {
  event.respondWith(
    caches.match(event.request)
      .then(response => {
        if (response) {
          return response;
        }
        return fetch(event.request);
      })
  );
});

self.addEventListener('activate', event => {
  const cacheWhitelist = [CACHE_NAME];
  event.waitUntil(
    caches.keys().then(keyList => {
      return Promise.all(keyList.map(key => {
        if (cacheWhitelist.indexOf(key) === -1) {
          return caches.delete(key);
        }
      }));
    })
  );
});
2.Register Service Worker in App: Register the service worker in your main application file, ‘main.js.’
import App from './App.svelte';

const app = new App({
  target: document.body,
  props: {
    name: 'world'
  }
});

if ('serviceWorker' in navigator) {
  navigator.serviceWorker.register('/service-worker.js')
    .then(() => {
      console.log('Service Worker registered successfully.');
    })
    .catch(error => {
      console.error('Service Worker registration failed:', error);
    });
}

export default app;
Step 4: Add Offline Support
We need to make sure that our app can work offline. This involves caching the application shell and assets, which we’ve already done in the service worker setup. Additionally, we can provide feedback to users when they are offline.
App.svelte
<script>
  import { onMount } from 'svelte';

  let online = navigator.onLine;

  const updateOnlineStatus = () => {
    online = navigator.onLine;
  };

  onMount(() => {
    window.addEventListener('online', updateOnlineStatus);
    window.addEventListener('offline', updateOnlineStatus);
  });
</script>

<main>
  <h1>{message}</h1>
  <p>This is a simple Progressive Web App built with Svelte.</p>
  {#if !online}
    <p style="color: red;">You are currently offline.</p>
  {/if}
</main>
Step 5: Add Push Notifications
Push notifications help keep users engaged by providing timely and relevant updates. To implement push notifications, we need to set up a push notification service.
1.Configure Firebase: Use Firebase Cloud Messaging (FCM) for push notifications. Create a Firebase project and get your Web Push certificates.
2.Integrate Firebase: Install Firebase in your project.
npm install firebase3.Setup Firebase in Service Worker: Modify ‘service-worker.js’ to handle push notifications.
importScripts('https://www.gstatic.com/firebasejs/8.6.1/firebase-app.js');
importScripts('https://www.gstatic.com/firebasejs/8.6.1/firebase-messaging.js');

firebase.initializeApp({
  apiKey: "YOUR_API_KEY",
  authDomain: "YOUR_AUTH_DOMAIN",
  projectId: "YOUR_PROJECT_ID",
  storageBucket: "YOUR_STORAGE_BUCKET",
  messagingSenderId: "YOUR_MESSAGING_SENDER_ID",
  appId: "YOUR_APP_ID",
  measurementId: "YOUR_MEASUREMENT_ID"
});

const messaging = firebase.messaging();

messaging.setBackgroundMessageHandler(payload => {
  const notificationTitle = 'Background Message Title';
  const notificationOptions = {
    body: 'Background Message body.',
    icon: '/firebase-logo.png'
Advanced Features and Best Practices
Lazy Loading
Lazy loading helps improve performance by loading only the necessary components when required. Use Svelte’s ‘import‘ function to implement lazy loading.
<script>
  let Component;
  const loadComponent = async () => {
    Component = (await import('./Component.svelte')).default;
  };
</script>

<button on:click={loadComponent}>Load Component</button>
{#if Component}
  <Component />
{/if}
State Management
For complex applications, consider using a state management library like 'svelte/store‘.
import { writable } from 'svelte/store';

export const count = writable(0);
<script>
  import { count } from './store';
</script>

<button on:click={() => $count += 1}>Increment</button>
<p>{$count}</p>
SEO Optimization
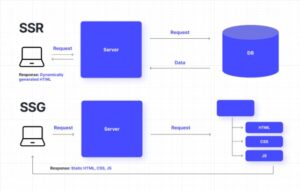
Even though PWAs are primarily client-side, you can improve SEO by pre-rendering or server-side rendering your Svelte app using Sapper or SvelteKit.
Optimizing Performance
Performance is critical for PWAs. Here are some additional tips:
- Image Optimization: Use modern image formats like WebP and leverage responsive images.
- Code Splitting: Break your code into smaller chunks to load only what is necessary.
- Minification and Compression: Minify your CSS and JavaScript, and compress your files using gzip or Brotli.
- Critical CSS: Inline critical CSS to ensure the page loads as quickly as possible.
Security Best Practices
Security is paramount for PWAs. Follow these practices:
- HTTPS: Always serve your PWA over HTTPS to ensure data integrity and security.
- Content Security Policy (CSP): Implement CSP to prevent cross-site scripting (XSS) attacks.
- Service Worker Security: Ensure your service worker does not have access to sensitive data or APIs.
Testing and Debugging
Thorough testing ensures a robust PWA:
- Lighthouse: Use Lighthouse in Chrome DevTools to audit your PWA for performance, accessibility, and best practices.
- Cross-Browser Testing: Test your PWA on different browsers and devices to ensure compatibility.
- Offline Testing: Simulate offline conditions to verify that your service worker and offline functionality work correctly.
Deploying Your PWA
Deploying your PWA involves several steps:
1.Build Your Project: Run your build command to generate the production files.
npm run build2.Serve the Files: Use a static server to serve your files. You can use services like Vercel, Netlify, or any other static hosting provider.
3.Register a Service Worker: Ensure your service worker is correctly registered and working in the production environment.
4.Monitor Performance: Continuously monitor the performance and usage of your PWA using tools like Google Analytics and Web Vitals.
Conclusion
Building a Progressive Web Application with Svelte offers a streamlined and efficient path to creating highly performant, responsive, and engaging web experiences. By leveraging Svelte’s compile-time optimizations and the robust capabilities of PWAs, you can deliver apps that not only feel native but also provide offline functionality, push notifications, and seamless user experiences across all devices. The combination of Svelte simplicity and the power of PWAs ensures that you can build modern, fast, and user-friendly applications without unnecessary complexity. Embrace this dynamic duo to elevate your web development projects and stay ahead in the rapidly evolving landscape of web technology. Happy coding!


